Sunday, January 31, 2010

The End of an Ugly End Table

Hey ya'll! I hope ya'll aren't mad at me over the one big fat post for "D" week. I had some other ideas, but that fake snow day really got to me. Let's just say I was all about homemade chocolate chip cookies and dyeing (spelling anyone??) my hair. I guess I could have made that another "D" post, but you'll just have to picture me with brown hair all by yourself.

ANYHOO...Week 5, "E" week in:


I have at least 2 projects for you, one will require some help on your part, so check back often!!

I have a booth at a local "thrift store/antique mall" place in town. I am a little addicted and told the owners that I think I spend more there than I make, but that's okay. On one of my weekly "check on my booth, run through and see if there is anything I NEED" trips, I came across this little beast:


This time I got a little screwdriver happy before I took pictures. Still not used to showing befores AND afters. I'll get there, someday.

Anyway, I roughed it up a little (remember me, ADHD on decorating, little patience for prep work) and spray painted this little baby a really good shade of blue. After the paint was dry I lightly sanded the high spots then used some brownish glaze, like in some other projects (here and here), to brush in the crevices and help pull out some of the detail. I also put about 3 coats of polyurethane on it.

The end table was ugly brown 1970's with wire in the doors, but it had some great details and the glaze helped pull it all out. After I finished the painting, I stapled fabric in where the wire used to be. The fabric was actually my inspiration for the color. I spray painted the door pulls black and put it all back together.

Here she is again, before:


and her cutie patootie after:


I kind of started a thing with Scarlett (you can read about her here ), so I can't leave this little lovely without a name.

Hmmmm (thinking music)

Okay, I got it. Hence forth and forever more she will be Bluebell. She's ready for her close-up Mr. Deville

Bluebell's inspiration: the blue birds

(I know bad picture...sorry, teacher here, not a photographer nor a teacher of photography)


Oh and I forgot to tell you. She cost me almost three times as much as Scarlett. (To refresh your memory, Scarlett was $2, I must have loved Bluebell more, she was $5! Don't tell Scarlett though, she'll get a complex!)

Linking up with Miss Mustard Seed and SNS with Donna:
Furniture Feature Fridays


Funky Junk's Saturday Nite Special
I've also joined into the "Power of Paint Party" at Domestically Speaking, I'm telling you a little can of paint can make a HUGE difference!
Have a great week! Come back and see me!

Friday, January 29, 2010

D is for DVD

Okay folks, I'll admit it. I have stunk it up pretty bad this week with the "D" projects. So many things I could blame it on: testing at school, 2 night classes, 2 migranes, but isn't that just the way things go? Today; however, is a wonderful day. We have a "fake" snow day! I call it fake because the weather man got everyone freaked out about a possible 10 inches of snow and as of 10am we have ZERO.

Sidenote; I live in Kentucky. In the area of the famous "Ice Storm of '09" And ironically, this recent weather forecastt came on the year anniversary of that weather event. If you don't know about it, in a nutshell we are talking no power, no water for like 2 weeks.

I'm not complaining about having this fake snow day. I rather love it. I get to catch up on laundry and baking and decorating and sewing and cleaning and, of course, blogging.

So, thanks to the fake snow day, I am finally bringing you the first blog of "D" week in:


I love movies. I could watch certain ones over and over (The Notebook-when I want to bawl my eyes out-You've Got Mail, AIr Force One, The Rock). I have three kids who love movies. WE HAVE ALOT OF MOVIES. I am going to ask you to not judge me here, but I let my kids watch a movie before they go to sleep at night.

The problem comes when the movies are all over the house and stored in different bedrooms. My 5 year old is alseep in bed and my 9 year old wants a movie out of his room. I needed a central location for them.

On a weekly jaunt to one of my favorite thrift stores, I came across this:


It also had doors on it. Hubby got the doors off before I could get the "before" picture. (Yes, he has since learned to take a picture before he touches anything.) I KNOW this looks rough, but it was the perfect depth for the little nook I wanted to place it in. You should have seen the look hubby gave me when I asked him to "rough it up so I could paint it." He said, "Uh, I think that is already taken care of." I didn't care, I saw the potential.

I spray painted it, with several coats of paint. Then I finally bought some Rustoleum white paint and I will tell you I will NEVER use another brand again.

Confession: There was a point that I thought it wasn't going to work out. Actually several points. 1) when the paint WOULD NOT cover this thing 2) When the panel on the doors didn't come out the way I thought they would (I had planned on putting fabric in where the panels were). There were some scary moments with this little sucker.

I figured out the door delimma by stapling my fabric to poster board and slipping it into the groves left by the panels:


It turned out just like I pictured it would! I was so relieved, er I mean glad. Hubby was surprised I pulled it off. I couldn't believe I stuck it out.

I am ADHD on decorating projects. I start out meticulous and gung ho, then I get all "I want this done" and messy.

I am still looking for a basket to slide in the where the drawer was, but here she is in her place and hiding all those movies:


Thanks for stopping by. I may get one or two more "D" projects squeezed in on my fake vacation. Check back for parties I've linked to and projects I've shared!


Update: 1:09pm and it finally started snowing!
Linked to:
Furniture Feature Fridays

Thrifty Decor Chick Before and After Party --if you haven't seen her, she's GREAT!

Saturday, January 23, 2010

Let's Play School

You would think after spending 7 hours in a classroom, the last thing my kids would want to do would involve the "S" word (school). But they love to play school and will set up a school room at least 3 times a week.

Sidenote---for you OCD types, I know I am still on week "C" of my:


but, stay with me here. It will all come together in the end.


I am a bit of a control freak and I cannot stand the unorganized, "non-cute" look of this:


or the utilitarian look of this:


But my kids love to play school and this is their set-up, so what is a control freak, decorating maniac of a mother to do?
Shop, of course!

So one day while visiting one of my favorite thrift stores (you can see more of my finds from them here.) I came across this little gem:


It had a veneered board in it that was in bad shape. I took that out and gave it a good coat or two of simple white spray paint. I got a new board and hubby helped out by painting it with chalkboard paint (about 3 coats). There were some little metal brad things on the sides that I took out and spray painted silver. After brushing on some silver glaze here are the results:

Also, the red ribbon holds chalk. There was a brad thing missing so I threaded some ribbon through the hole and tied the chalk on.


AAAhhhhhhh....so much better.

Kids can play school. Check.

Mom can have something cute to look at. Check.

Rest little eyes, rest.

Here are some more pics for your cyber-pleasure.


That wraps up week "C." If you were wondering this post is "C" is for chalkboard. I am still thinking about a linky party. Anyone interested? In the meantime, I am linking up with Donna at Funky Junk, Bec at Beyond the Picket Fence and Carolyn at My Backyard Eden. Come see...

Funky Junk's Saturday Nite Special


Make it Yours @ My Backyard Eden


Wednesday, January 20, 2010

Get in the Corner!!


This has been such a week...ever have one of those that stretches out in front (and behind) you for what seems like forever? I just had to get some blogging done as a creative outlet.


So you are forced to endure yet another addition to:


We are still on "C" week, so this project is about (as the title suggests) "getting in the corner." I think we all have a troubling spot like this in their home.

Here is my troubling corner during Christmas. So innocently sitting there, looking all full and purposeful.

If you haven't read, we moved into this house the weekend of Halloween (this year). I started putting up Christmas decorations 2 weeks later. I didn't really do much "everyday" decorating because I knew my Christmas stuff would be going up, SO this corner didn't bother me until...

the tree came down...YIKES holy blankness Batman!

What's a girl to do? Ficus tree? Been there, done that. Chair and side table? Check. Oooooh, wait a minute, didn't the old owners take down some bi-fold doors from the dining room? A screen? That could be fun...

I took the doors and painted them a light blue that is in the background of my new roman shades (I have mostly red and yellow in my house, I liked the idea of pulling a little more blue in.)

Along with the paint, I brushed some glaze along the edges to give it more depth. Hubby put the hinges back on to create a tri-fold screen. I put it in the corner, but felt like something was still missing. I LOVE transferware and I have a lot of it that I hang on the walls. Since we just moved in, I hadn't hung much and I thought I would try it out on the screen.

Here is the corner after:

It still needs a little sumpin, maybe some greenery or arrangement on the wall beside it (that basket beside it on the floor is an option for the wall). It's a work in progress, but I love how it pulls some of the blue from my windows (which you can't see) to the other side of the room. Here is the "corner on parade" enjoy.


I am linking up to:
The DIY Show Off

Funky Junk's Saturday Nite Special


Have a great rest of the week. Check back for one more "C" project up my sleeve!


Sunday, January 17, 2010

C is for Cardboard

Call me crazy, but I never knew the "card" is card table would actually mean "cardboard." I just thought it was because you played cards on them.

Yeah, I'm a natural blonde-or at least I used to be. It was awhile before I caught onto the purpose for speedbumps too. I thought they had radars in them-what good is that if you have to slow down to go over them, you don't catch the speeders!


If you have been following Decorating A-Z, you saw my last auction revamp. If not, check it out here. Now for my next victim, er I mean project....

I bought about 4 cardboard tables (let's call a spade a spade, are you made of cardboard or not??) at the same auction I got Scarlett in and they cost me $3 a piece. They cost more then Scarlett because I had to fight some people off for them. Anyway, here is one of them before:


They sat in my garage for a couple months until I could get the nerve to try to cutify them. My plan was to Mod-Podge some cute scrapbook paper on them, but I wasn't sure how the messed up tops would handle all the glue and such.


When I finally got up the nerve, I hauled one into the downstairs den and decided to try to tear off the top layer of paper (that was when it dawned on me that it was made of cardboard). Huge mess, but kind of cathartic.


Another side note about me: I am a little OCD about peeling paint and paper. It is all I can do not to peel it when I come across it. If you ever invite me to your home, check the seams on all your wallpaper, it's an illness I tell you. You've been warned.


Here is the during: (yeah I started getting nervous...)


But notice the wooden legs, that is what made me want to pay $3 per table. I love the gams on this thing.

After I ripped all the paper off (which took a little while), I primed the top 2-3 times to seal the rest of the paper. I found several papers that coordinated and starting cutting 4 inch squares to use for the top.

I marked off the diagonals on the table because I wanted to lay the papers on a 45 degree angle. I placed the papers on the table in the pattern I wanted then tried to pick them up in an organized a fashion as possible. I got nervous about using Mod-Podge because I struggle with the decoupage bubble blues, so I opted for spray adhesive. I sprayed the table then began laying the pieces where I wanted them.


I had to work on the "tiles" for the edges and my fingers were a sticky mess, but it turned out pretty good. I painted the sides of the table in a coordinating color (a light aqua blue) then covered over the whole table with a couple coats of Mod-Podge to help seal it. Then the bubbles began to appear--BLIMEY! I let the glue "cure" overnight and I gave the table about 3 coats of polyurethane and trimmed out the paper edges in coordinating ribbon. Aside from the bubbles she is pretty cute.


I did another table later in the week. This time I cut the paper into 6 inch squares and I used Mod-Podge. I thought the 4 inch tiles looked a little "quilty."

Here is the best tip I can give you about decoupaging: use a tool to help you smooth the paper down. I used to just use my fingers to work all the bubbles out, but this time I used a "Pampered Chef" scraper and IT. WORKED. BEAUTIFULLY!!!! You could use a credit card or a tool like the kind you use to put those vinyl words up, just use something other than your hands. I got ZERO bubbles on the second table. I didn't change any of the other steps. It turned out so much better. Here are a few shots of it.


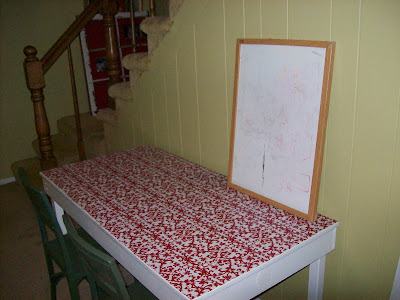
My plan is to sell these two, then make one or two for me to keep. I already have the black and red papers that I want to use. (Any bets on if some of it is toile???)

I'm linking up to the following (make sure you drop by and see all the cuteness!!)


Funky Junk's Saturday Nite Special

I've also link up to Reinvented's Trash to Treasure Tuesday and Kimba over at A Soft Place to Land:

DIY Day @ ASPTL


Beyond The Picket Fence

LinkWithin

Related Posts with Thumbnails